How to Set up Your Own Home VPN Server – Full Guide

This complete guide will teach you how to set up a VPN at home.
- Why do you need your home VPN server
- How to set up your VPN server on your computer
- How to use a router with built-in VPN server capabilities
- Set up a home VPN server by flashing your current router
- How to use a cloud service provider
- What are the disadvantages of setting up a VPN server on your own
Quick Summary
Virtual Private Networks (VPNs) enable anonymous internet browsing by creating a secure connection between your device and a VPN server. There are several methods to set up your own VPN server, each with its own advantages and considerations.
One straightforward option is to purchase a router with built-in VPN capabilities, providing an easy setup process. Alternatively, you can convert your personal computer into a home VPN server, which is often the most cost-effective solution.
If you prefer not to buy a new router, you can flash your existing router with custom firmware to enable VPN compatibility. Another option is to use a cloud service provider like AWS to create a VPN server in the cloud.
Each method requires specific steps depending on your operating system. While setting up your VPN server can enhance security, it’s crucial to ensure that all basic security configurations are correctly implemented to prevent your devices from being compromised.
In addition, bandwidth changes in your home network can significantly affect the VPN connection. Therefore, using a trusted VPN service provider for all your VPN needs is safer.
I recently reviewed this article to ensure that the steps outlined are still relevant in 2024. After testing them personally, I can confirm that the information provided remains accurate and effective.
Additionally, I’d like to suggest the option of using a commercial VPN like ExpressVPN at home. A convenient approach is to install it directly on your router, rather than on individual devices.
This method offers a significant advantage in terms of ease of setup, as it is far simpler than configuring a personal home VPN from scratch.
Anyway, you’re probably here to learn how to set up your own home VPN and not to read a sales pitch for a commercial VPN, as such just click here, and you will be brought straight to the section that explains step-by-step how to set up a home network VPN server.
Why do You Need Your Own VPN Server?
We usually subscribe to a commercial VPN service and connect to one of their remote VPN servers closer to our location. Sometimes you may use a free VPN that may not be as secure as you expect and opt to subscribe to a paid VPN service for better privacy.
But, you do not necessarily need to pay for a VPN because you can also create your VPN server at your home. Then you can securely connect to your home network when you are away.
Setting up your VPN server is cheaper than paying for a premium VPN service, as most methods, like hosting, charge for the computing services you use. Moreover, such VPNs are disposable, meaning you can terminate your server after using it.
In addition, it will be more secure than commercial VPNs because you are not providing your data to an external service that could be keeping your access logs and sharing them with third parties for many purposes.
There are several ways you can achieve this. But, you need some technical knowledge on setting up a home VPN on your own, as it can be tricky.
In this guide, we will explain different ways you can create one. We will start with the most cost-effective method: turning your computer into a VPN server.
How to Set Up Your VPN Server Using Your Computer?
This method may be the cheapest way of creating a VPN server on your own as you do not need any external hardware, but there can be limitations.
Limitations
- You need to make sure your computer is constantly switched ON on your computer. Because if the computer is switched off, there is no way you can log into it.
- You will need to set up port forwarding for your router.
- We use Microsoft’s inbuilt VPN server hosting functionality that uses insecure VPN protocol PPTP for this method. In this setup, you need to expose your computer directly to the Internet, from which your computer can become vulnerable to cyber-attacks. Thus, using this method, use a strong password for authentication and a different port forwarding method.
Establishing a VPN server in Windows 10 using Windows built-in server
Setup your Windows 10 Computer
Step 1: Open ‘Network Connections” window. Then click ‘organize’ and select Layout-> Menu bar.
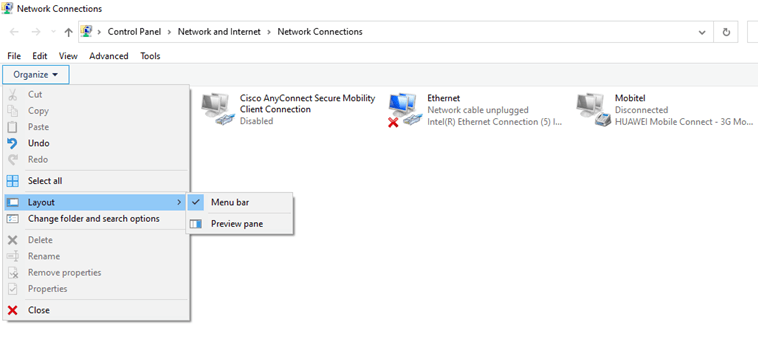
Step 2: From the menu bar, select ‘File’->’’ New Incoming Connection.’

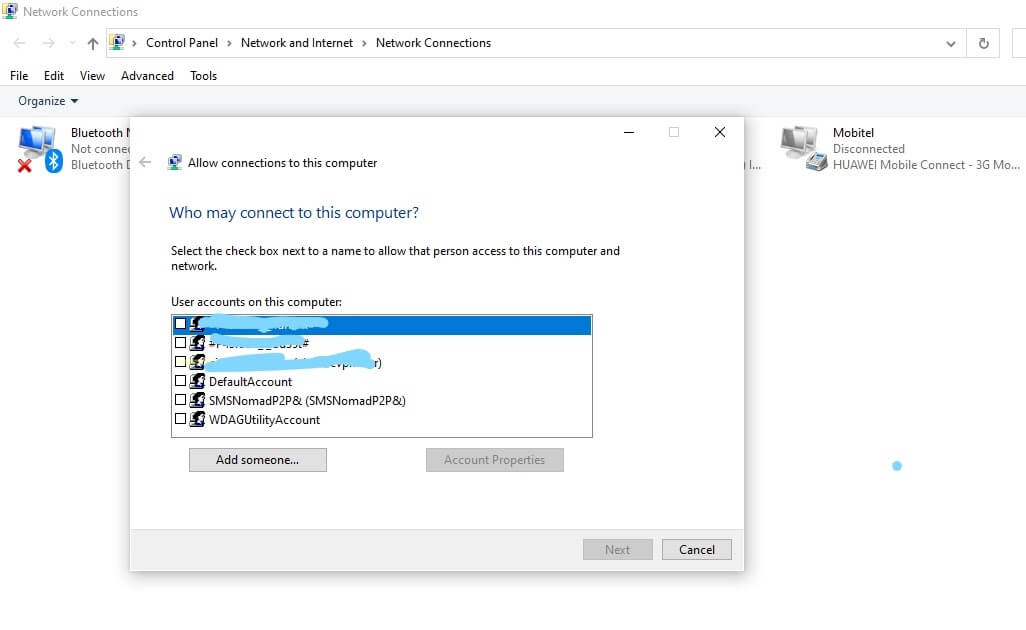
Step 3: Next, select the user accounts you want to connect to in the popup screen. We recommend you use a separate user account with a solid password to set up the VPN server so your funds will be safe. To do that, click on the “Add someone” button. After you have selected the user accounts, click on the “Next” button.
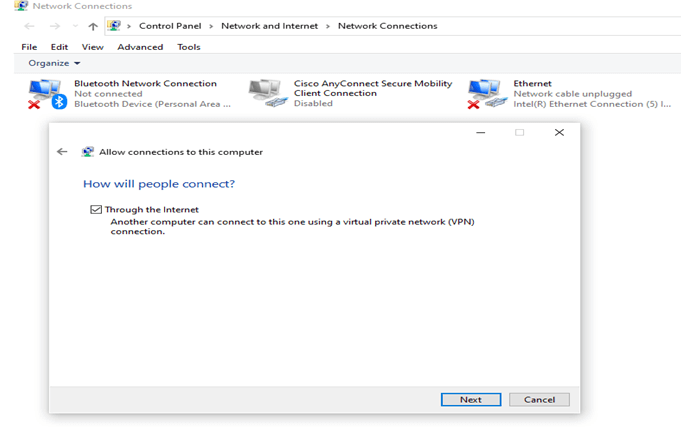
Step 4: Next, select the “Through the Internet” option to allow VPN connections to your computer over the Internet.
Step 5: Next, select the protocols on the list that should be allowed for incoming connections. After choosing what you want, allow access. If you do not wish to enable the connections to access printers, opt-out ‘File and Printer sharing for network connections.’
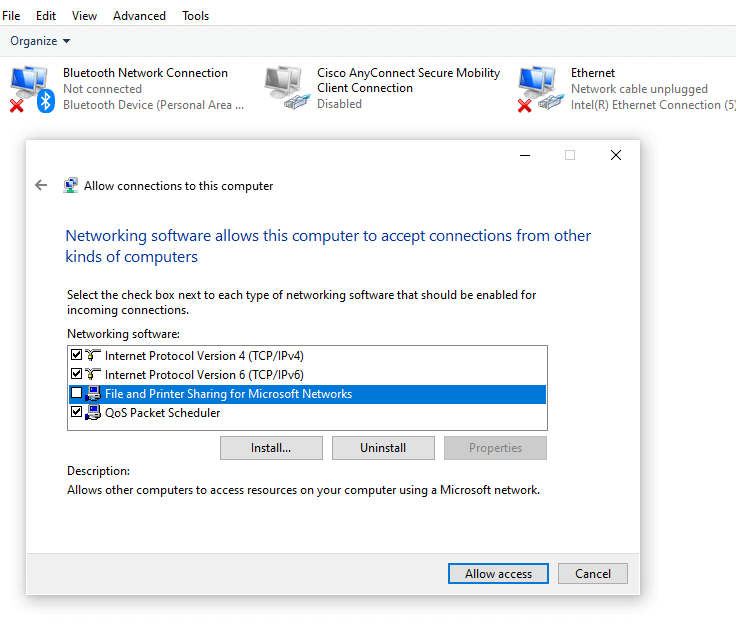
Step 6: Next, select the protocols on the list that should be allowed for incoming connections. If you do not want to enable the connections to access printers, then opt-out of ‘File and Printer sharing for network connections.’ After choosing what you want, allow access.
Now your computer acts as a VPN server, ready to service connection requests.
Setup port forwarding in your router
The next task is setting up port forwarding in your router to connect to the VPN server via the Internet. By setting up port forwarding, your router can send the specific traffic to your computer.
- Find the IP address of the computer you set up the VPN server
- Log into your router from the web. Then set up port forwarding for port 1723, which is for PPTN protocol to your computers’ IP address.
How to Improve Security?
- Set the firewall port forwarding rule allowing traffic only from specific IP addresses
- Use an external port to connect to port 1723 to connect via that external port, protecting the VPN servers in the default port.
Connecting to the VPN server
Step 1: Go to network and internet settings in windows ten and select VPN-> Add a VPN connection.
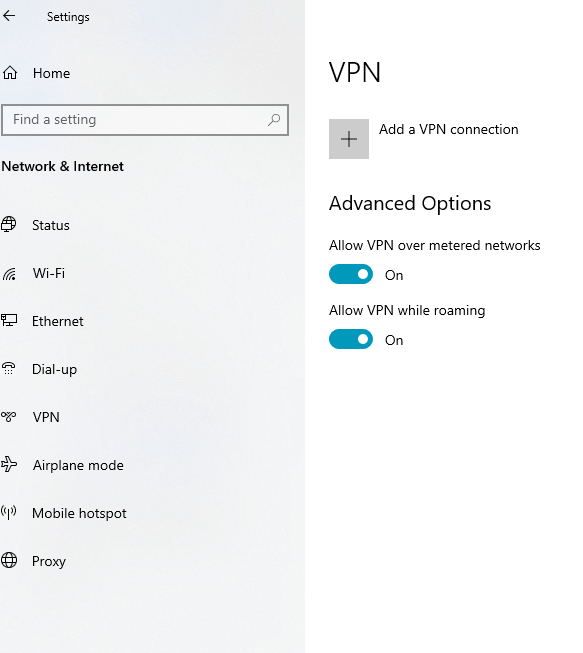
Step 2: Click on Add a VPN connection and do the following.
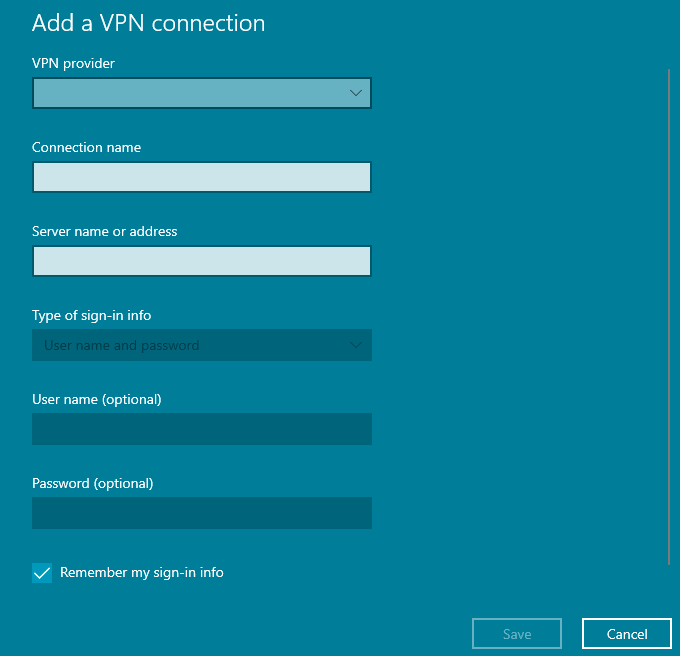
- Choose Windows (built-in) as the VPN provider
- Enter a connection name of your choice
- Enter the IP address of the VPN server you set up
- Select the VPN Type as PPTP
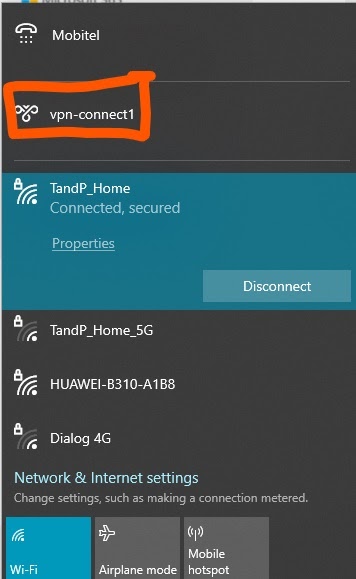
- Enter the type of sign-in info. You can enter a username, password, one-time password, certificate, or a smart card. Enter your username and password in the respective boxes if you choose username and password for the sign-in option and then save. Then your VPN connection will be listed along with the wi-fi connections.
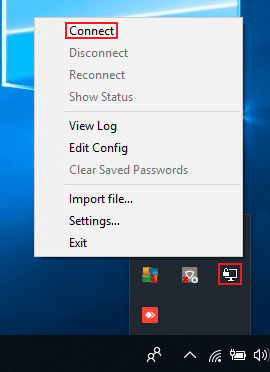
Step 3: Next, select the VPN connection you created in the taskbar network icon, select ‘connect,’ and enter the user credentials. Finally, you will be connected to your VPN server.
Establishing a VPN server in Windows 10 using OpenVPN
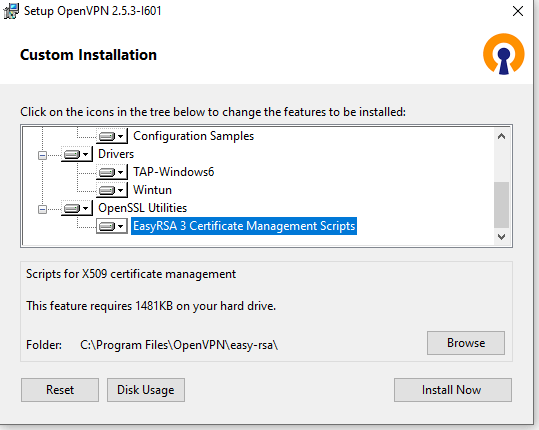
Install Open VPN
The first step of this method is downloading the OpenVPN installer for Windows directly from the Open VPN website. When you start, do the custom installation and select “EasyRSA 2 Certificate Management Scripts”.
Configure EasyRSA to generate certificates and keys
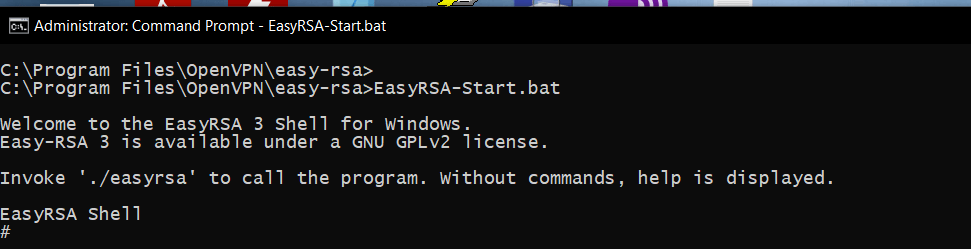
- Open the Command prompt as administrator
- Go to C:/Program Files/OpenVPN/easy-rsa
- Launch EasyRSA by typing the command “EasyRSA-Start.bat.”
- Create a directory for Public Key Infrastructure(PKI) using the command
./easyrsa init-pki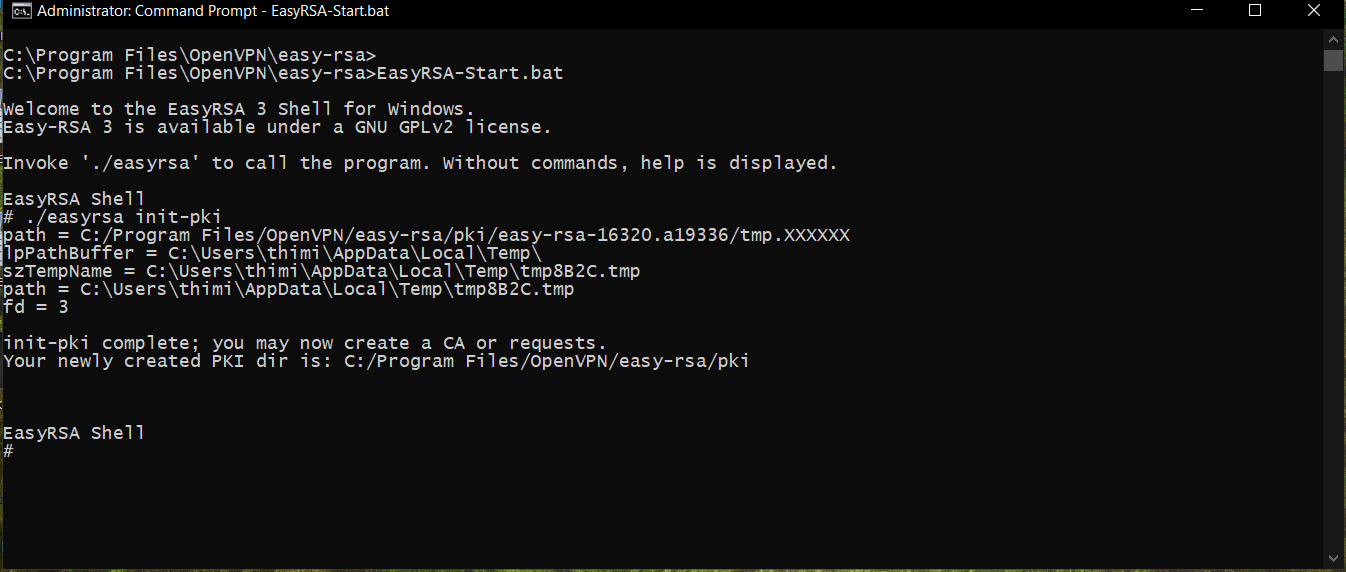
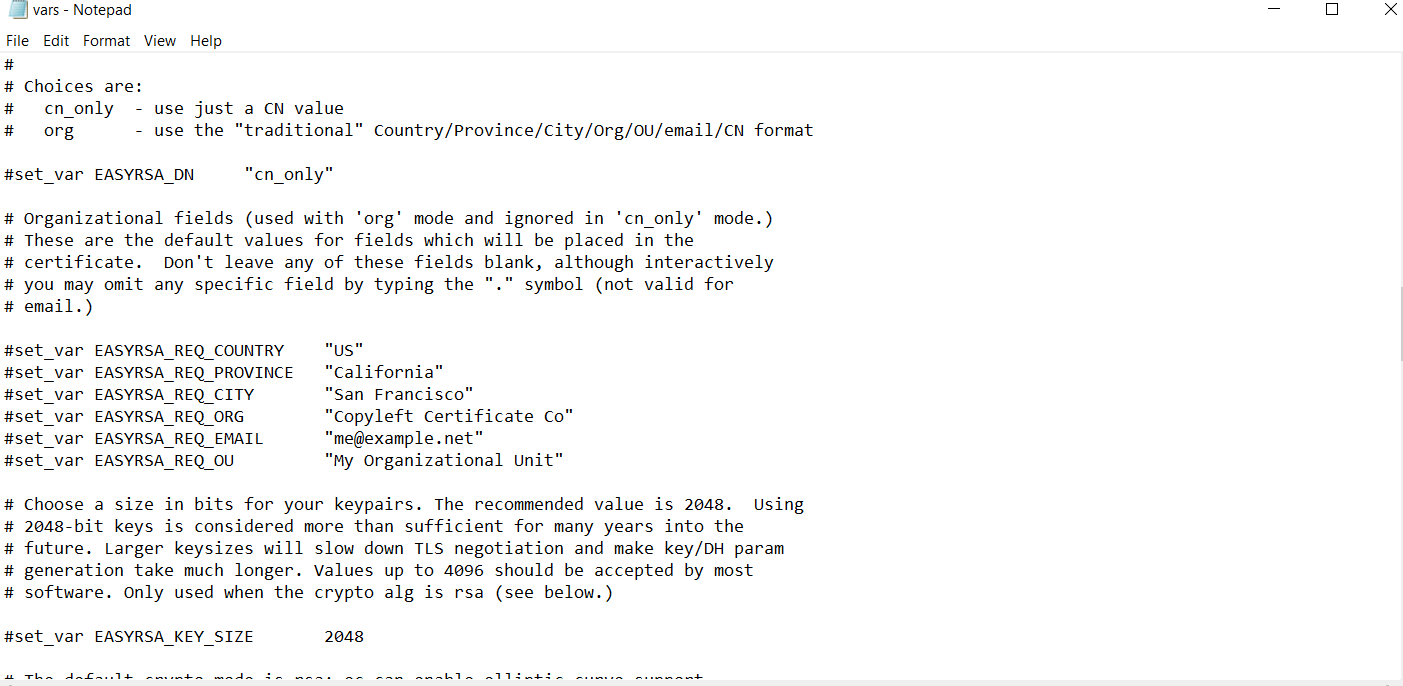
- Copy vars.example file located in easyrsa folder as vars.bat and open the file in notepad
- Edit the following line as you need and save
- Then type the following commands
vars.bat
./easyrsa clean-all
Now we have prepared easily for generating certificates and keys.
Generating certificate and keys
The next thing we have to do is to create the server and client certificates and keys. For that, execute the following commands one by one. First, build Certificate authority (CA) to sign the other certificates and keys.
1. ./easyrsa build-ca nopass
Build certificate and keys for server and clients as follows:
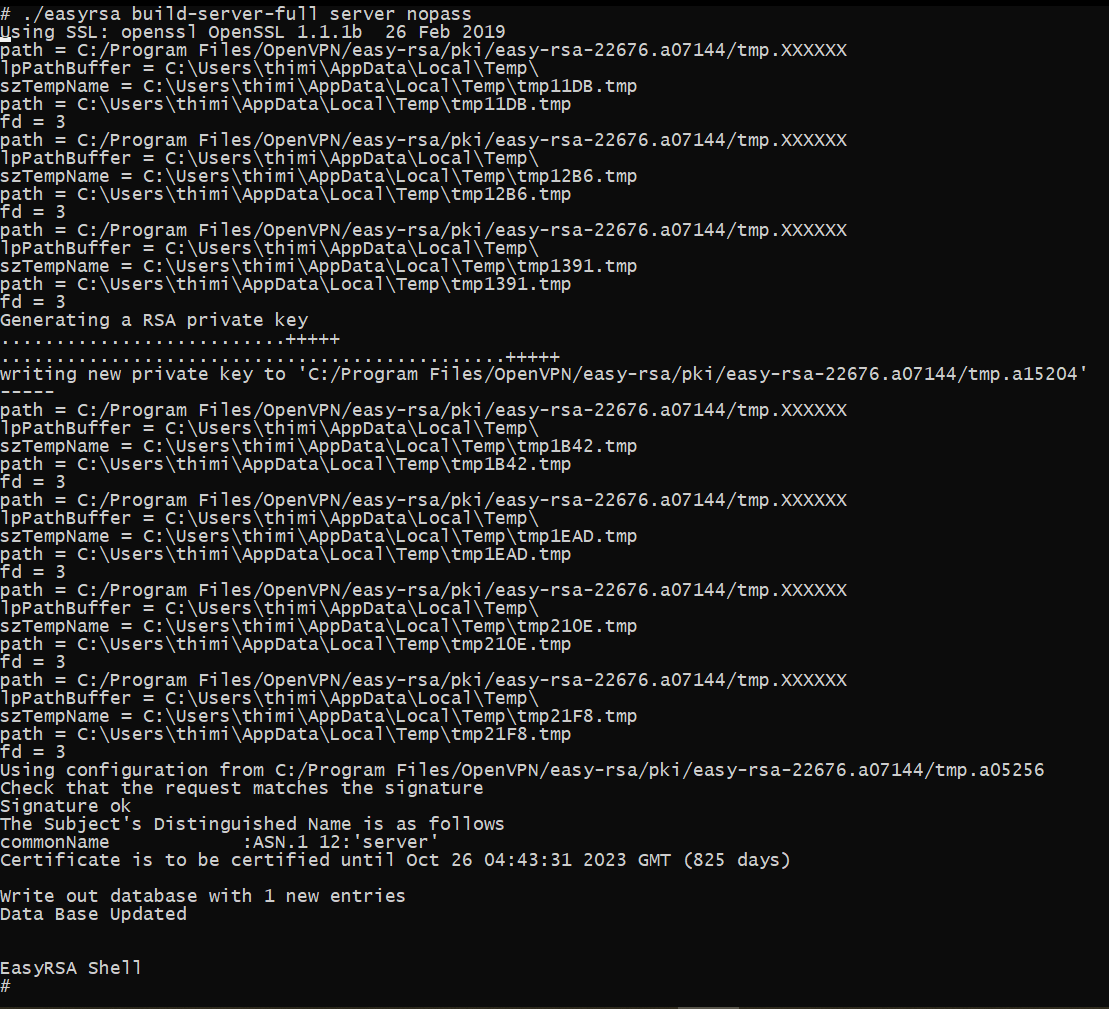
2. ./easyrsa build-server-full server nopass
3. ./easyrsa build-client-full Client1 nopass
Create Diffie-Hellman parameters
4. ./easyrsa gen-dh
After executing these steps, you can find the keys, certificate files, and Diffie-Hellman Parameters in the following folders.
C:/Program Files/OpenVPN/easy-rsa/pki – ca.crt (CA certificate) and dh.pem (Diffie Hellman parameters)
C:/Program Files/OpenVPN/easy-rsa/pki/private – server and client keys (server.key and client.key)
C:/Program Files/OpenVPN/easy-rsa/pki/issued – server and client certificates (server.crt, client1.crt)
Configure OpenVPN server
- Copy the following generated files into the ‘config’ directory of the OpenVPN folder
ca.crt
server.crt
server.key
dh.pem - Open ‘server.ovpn” located in C:/Program Files/OpenVPN\/sample-config
- Replace the following key, certificate, and dh file path with the actual paths. For example
ca “C:\\Program Files\\OpenVPN\\config\\ca.crt”

- Configure the other options as you need. If not, keep the default settings and save the file in the config directory.
Configure OpenVPN clients
- Install OpenVPN on all client machines
- Copy the following files created in the server machine to the config folder in the OpenVPN folder in each client machine
ca.crt
client.crt
client.keys - Make a copy of the client.ovpn” file located in C:/Program Files/OpenVPN\/sample-config
- Edit the file as you require and save it in the config folder.
- Copy the edited client configuration file to all the clients connecting to the server computer
Connect to the VPN server
Now you have done all the configurations required for the VPN server and the client machines. Finally, run the “Open GUI” as administrator. Then you can locate that GUI in the bottom right-hand corner. Just click on the “show hidden icons” and “OpenVPN” icon and click on ‘connect.’
Establishing a VPN server in Ubuntu
If you are an Ubuntu user, you can follow the same procedure in windows. Establishing the VPN server in Ubuntu is a very complex and time-consuming process. For more details, you can refer to how to set up an OpenVPN server in Ubuntu. In summary, the following are the essential steps you need to follow to create a VPN server in the Ubuntu server.
- Install OpenVPN
- Install EasyRSA
- Create the PKI directory
- Setup certificate authority
- Generate Server certificate and keys
- Generate Client certificate and keys
- Configure the OpenVPN server by providing the customizations you need in the configuration file.
- Adjust IP forwarding to route IP traffic correctly.
- Adjust firewall configurations to let OpenVPN know where to direct incoming traffic from clients.
- Start the configured OpenVPN server
- Create and install client configurations
Making your Raspberry Pi computer into a VPN server
You can also use OpenVPN in Raspberry Pi to set up a VPN server. This is, again, a pretty complicated process if you directly install OpenVPN and manually do the configurations. But you can quickly achieve this by using the install script PiVPN. In that process, first, you need to download the script from the PiVPN GitHub page.
This can make the configuration setup easier through a setup wizard. Follow up the build your own Raspberry Pi VPN guide to know exactly the steps to execute.
Apart from turning your computer into a VPN server, you can also try the following methods, which will be more costly.
Use a VPN Router with the built-in VPN server capability
Although it is cheaper, turning your computer into a VPN server can be pretty cumbersome. In that case, another alternative solution is to use a VPN router with an integrated VPN server setup capability. It is good if the router you buy supports a more secure VPN protocol than PPTP, like the OpenVPN protocol.
However, this can be expensive because if your current router does not have that capability, you may have to buy a new one.
Setting up your VPN router is relatively easy. In summary, the following are the essential steps you need to follow to set up your VPN router as a VPN server.
VPN Router Setup
- Launch a browser window from your PC connected to the routers’ network
- Enter the router IP address in the search to login into your router
- Enter the username and password of your router and login into it.
- Go to the Settings page and select VPN Service or setup page.
- Enable the VPN service by selecting the checkbox and apply
VPN Client Setup
Once you have enabled VPN in the router, download and unzip the VPN configuration files for the clients from the router control panel, then copy the files to the client devices. Finally, you can connect to the VPN from client devices.
Manually Flashing the current router
As in the second method, buying a VPN router can be expensive. But if you still need a VPN router without buying a new one, you can upgrade your current router by manually flashing it.
As flashing a router can be tricky, buy a pre-configured or pre-flashed router already flashed. But this option can be expensive.
First and foremost, toTo flash the router by yourself, you need to check if your router supports flash firmware like DD-WRT, OpenWRT, and Tomato. Then find out the instructions to follow on the firmware provider’s website.
- Download the firmware file into your computer
- Connect the computer to the Local Area Network (LAN)
- Log into your router by typing the router’s internal IP address in a web browser address bar
- Find the router update or upgrade section in the settings panel
- Follow the instructions from the firmware website and flash the router. This can involve resetting the router, uploading firmware, and upgrading.
- Restart the router if required.
- Log back into the router and enable OpenVPN.
- Follow the detailed instructions to create the VPN server: For example, DD-WRT firmware describes the server and client setup instructions. Adjust firewall configurations to let OpenVPN know where to direct incoming traffic from clients.
- Setup certificate authority
- Generate Server certificate and keys
- Generate and configure Client certificate and keys
- Download, Install and Configure OpenVPN
- Import Client certificate and keys to client devices
- Connect the client machines to the VPN server
Using a Cloud Computing Service
As we are now in the cloud computing era, another method is to use a cloud computing service provider like Amazon Web Services (AWS), Google Cloud, DigitalOcean, Scaleway, etc., to rent out Virtual Private Servers (VPS). If you are using AWS services, you can get the first year free of charge if you are free tier eligible.
However, this can also cost you money. Another problem with this method is routing the traffic through the hosting service rather than your home network. But on the other hand, you do not need to worry about maintaining the servers, as the service provider does this on your behalf.
Always follow the guides from the respective cloud provider when setting up a VPN server in the cloud. For example, you can set up an OpenVPN access server in amazon VPC to set up a VPN server in the AWS cloud.
What Are the Downsides of Setting Up Your VPN Server?
Like in every method, creating and using your VPN server has several disadvantages.
- This can be difficult if you lack the necessary technical and networking knowledge.
- If you miss out on any essential security setting, your devices can be vulnerable to cyber threats.
- If you do not upgrade your system with the latest security patches, ideally, your VPN connection is not as secure as most commercial VPNs that automatically update.
- Your home network can have slower upload and download speeds. Therefore, the VPN connection can become slower.
- You cannot guarantee that your ISP is not spying on you since there is only encrypted traffic between the VPN server and the client.
Wrap Up
Creating and maintaining your VPN server can be a good idea to save the cost of using a commercial VPN. In this article, we described four different methods you can achieve.
Among all the methods, turning your computer into a VPN server is the best choice as it is the most cost-effective and the most available method.
However, it would help if you considered the many limitations of that method before venturing into it.
Frequently Asked Questions
Some people found answers to these questions helpful
Why should you make your own VPN server?
If you are concerned about routing instructions data through an external service, you can take charge of your data using your VPN. If you have a business with private company files, a private VPN server can be an ideal solution to allow access only for company users.
Is your VPN server always secure?
Commercial VPNs often use shared IP addresses providing a higher level of security for your connection. But our home VPN does not have that option, as you can have only one IP address. As a solution, you can change the IP address frequently because this involves extra work.
How does DDNS help in setting up a VPN server?
DDNS or Dynamic Domain Name Systems is required if you have a dynamic IP address. Because Dynamic IPs are changing, having a DDNS helps you to have a fixed domain name that is easy to remember. With a DDNS setup, you do not have to re-configure your VPN server whenever the IP changes.
1 Comment
Chris Spaulding
August 10, 2022 3:37 pm
Great article! I have never done this before, so I have a basic newbie question. What are we supposed to edit in the client.ovpn file? Do we create separate client.ovpn files for each client? Big thanks for any advice.