How to Change Your IP Address on Android?

As you may already know, a device’s Internet Protocol (IP) address — whether dynamic or static — is its assigned 32-bit numerical label that can identify its host or network interface and location. You may want to change your IP address or switch it from dynamic to static; we’ll discuss these later.
For now, let’s get into what you really came here for. You’ll be happy to know that, with this straightforward guide, changing your IP address on an Android should be a cinch. You have two options to go about it:
- By using a reliable VPN
- By changing network and internet settings
I’ll walk you through each one…
It covers two main approaches: using a reliable VPN service and altering the device’s network and internet settings. For both methods, the guide provides detailed instructions on how to change your IP address through a VPN and by adjusting your device’s network and internet settings.
Additionally, it discusses the benefits of utilizing a VPN to modify your IP address and examines the reasons for wanting to change your IP address.
Using a Reliable VPN
A VPN can protect your internet traffic and your privacy. You can change your IP address to another one to conceal your IP. This is the most secure way to be anonymous on the internet.
1. First, you’ll need to sign up for a reliable and good VPN, such as ExpressVPN, NordVPN, SurfShark, or PureVPN.
2. Visit the Google Play Store and download the relevant apps for your Android mobile.
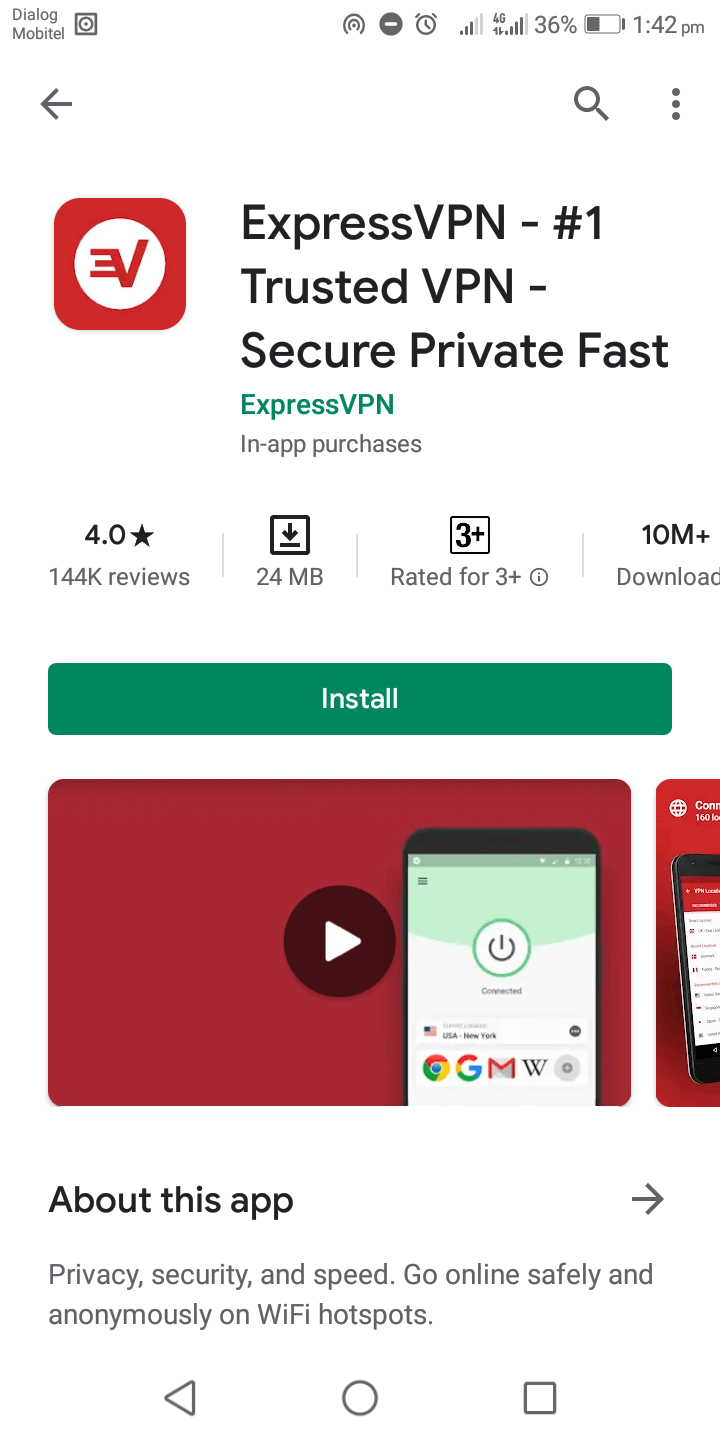
3. Install the app, open it, and enter your login credentials.

4. To connect, select the location or server of your choice. Sometimes called the “Smart Location”, whatever is recommended is generally best.
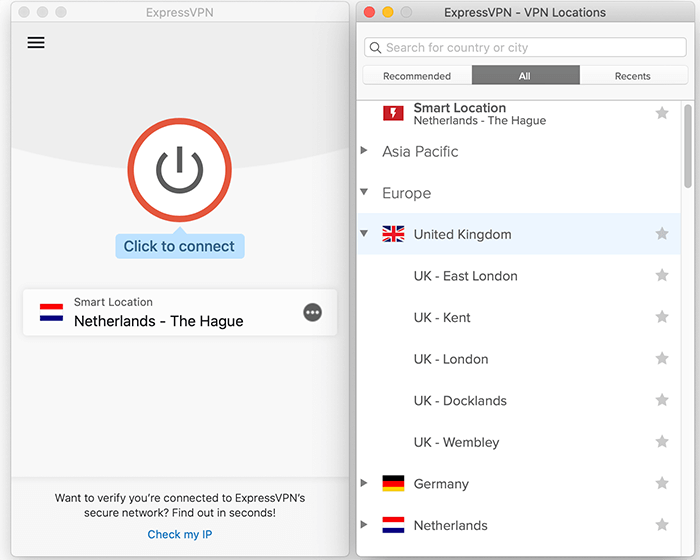
Your IP address will change, and no one will know your device’s IP. This is the best-proven way to stay anonymous online.
Changing Your Device’s Network and Internet Settings
These settings apply to any device with the Android operating system installed, be it Huawei, Samsung, Xiaomi, Google, or others. Making changes to the settings is easy.
1. Choose an Available Static IP Address
Before you change your IP address, several things must be done. One is choosing an available static IP address on your local network. This could be done with any computer connected to the local network.
If you have a Windows machine, do the following:
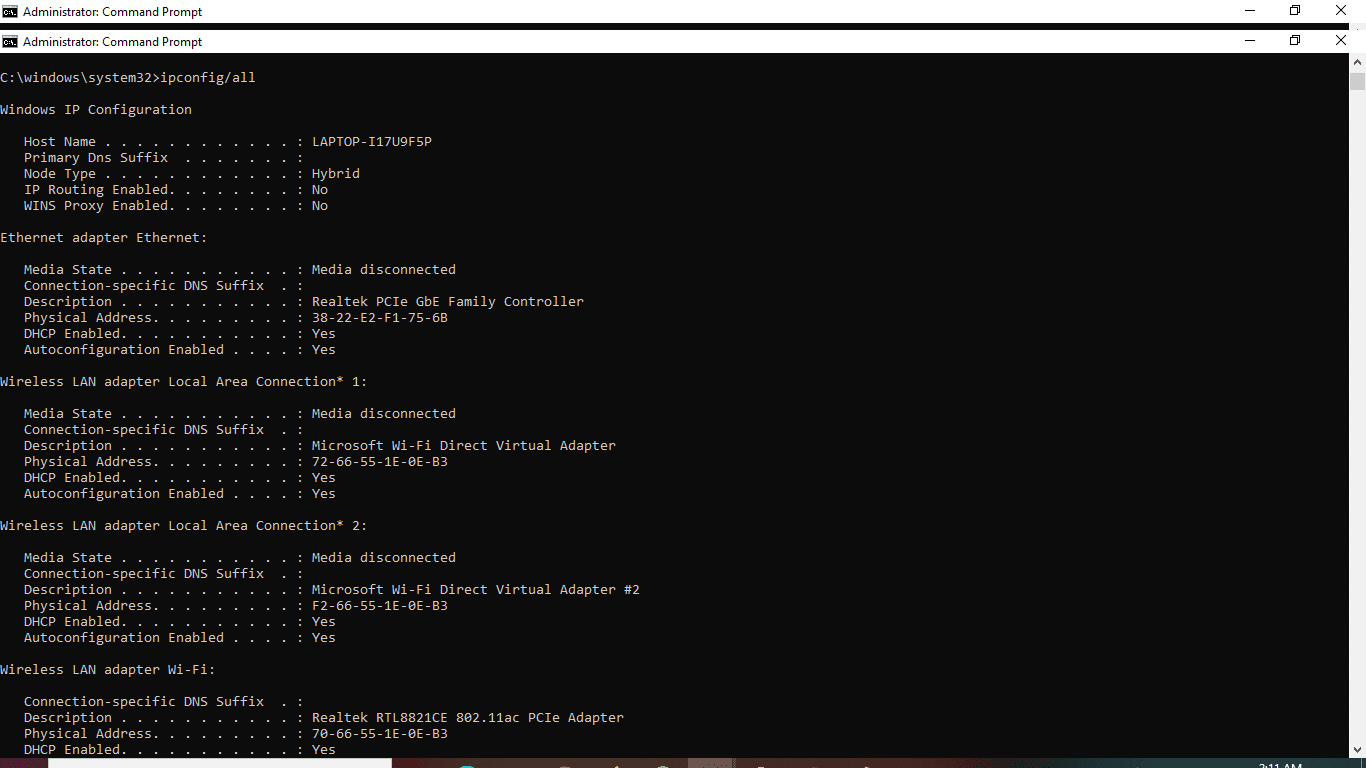
- Type cmd on your Start Menu and click on the Command Prompt desktop application.
- Enter ipconfig/all in the command prompt window and press Enter.
Then:
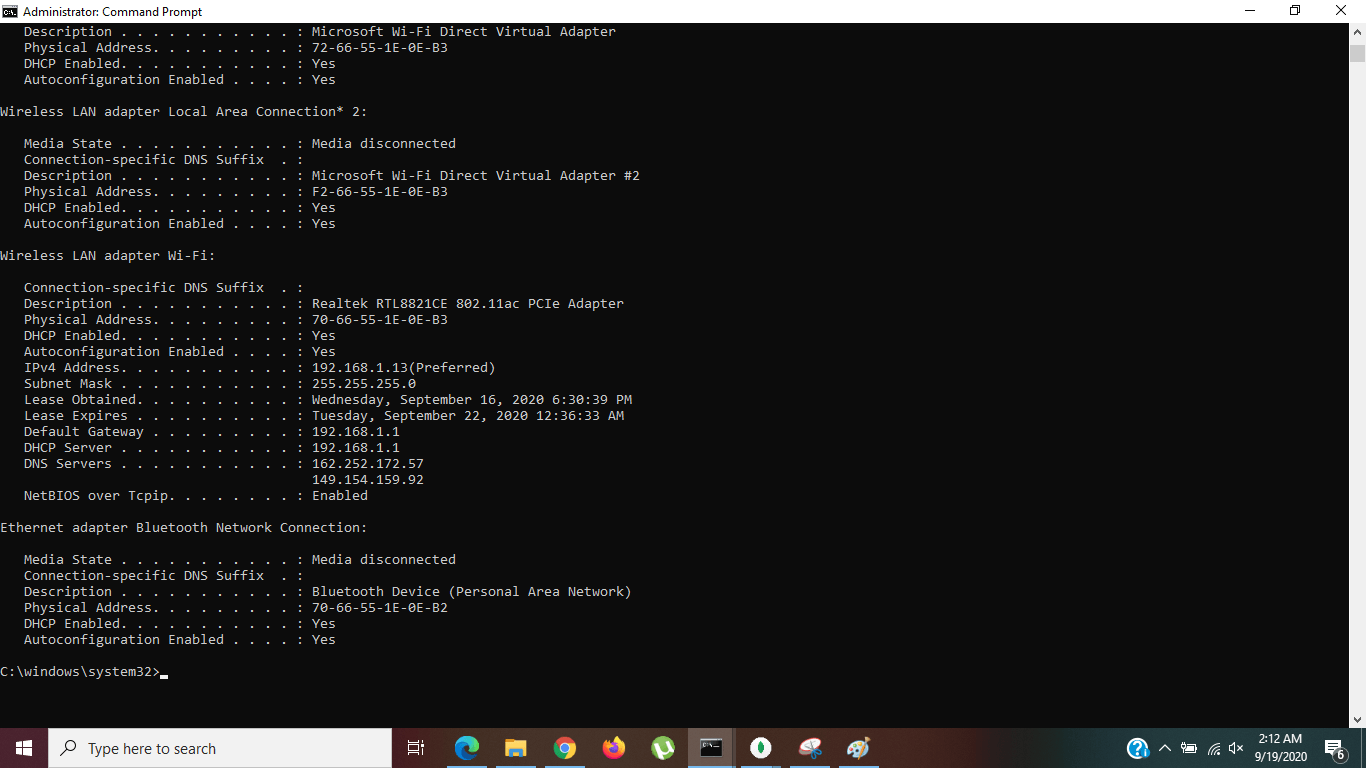
- Check the Default Gateway, DNS Servers, and IPV4 Address details in the command prompt output. Let me briefly introduce what they are and why they’re important for the next step.
Default Gateway
The default gateway is another IP address that the traffic you send from your device gets to when its final destination is outside the current local network.
This is the local network’s router’s private IP address. So, all the devices connected to this network send traffic to this IP address by default.
IPv4 Address
This address is the device you’re currently active on or from which you enter the above commands.
DNS Servers
DNS stands for Domain Name System. Many services operated on the internet or your local area networks, such as Mail servers and web servers, use DNS and are very important. ISPs use DNS server caching to minimize the traffic and avoid bottlenecks.
- Now, to find an available IP address on your local area network, use the ping command on different IP addresses shown in the network. I suggest you start from the router IP or the Default Gateway IP address and keep the process going until you find a free IP address.
This is how to use the ping command:
ping
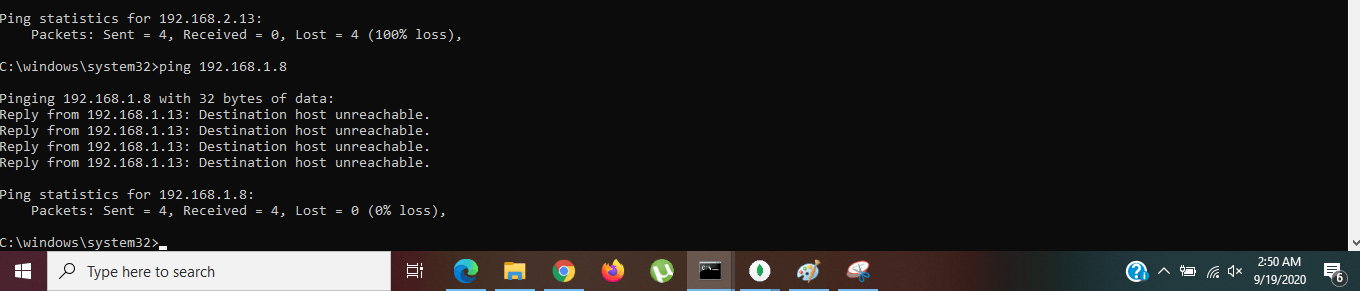
- How can you determine if it’s available? Simple. If the ping command gives you an output with a response time, an active device on the network is already assigned with the particular IP address. However, if you receive a response that says, “Destination host unreachable,” it’s available and is a possible candidate for your static IP address.
2. Change the IP address on Your Android Mobile Phone
You’ve probably decided what IP address to choose as your static IP address. Now let’s get on with the actual switching.
- Go to your device Settings.
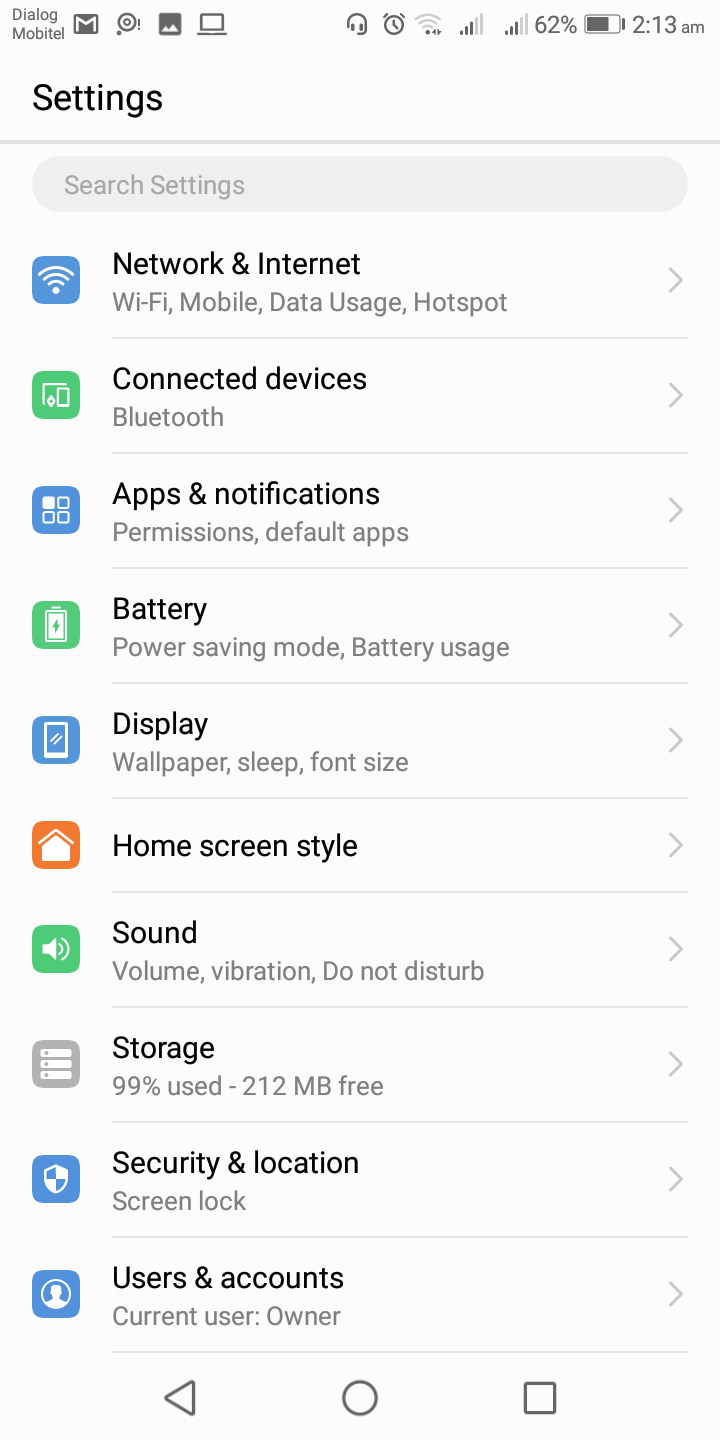
- Head over to the Network & Internet section.
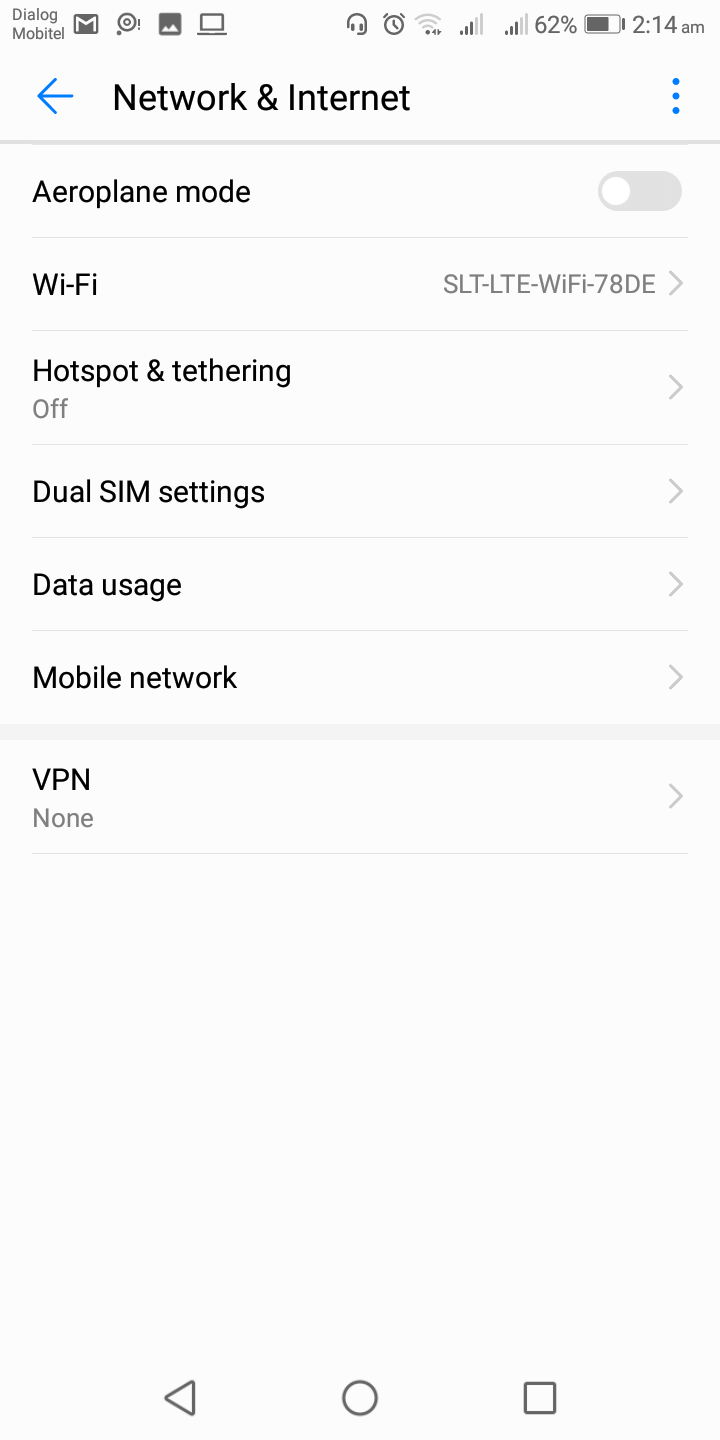
- Tap on Wi-Fi, where you’ll see all the available connections and the one you’re connected to.
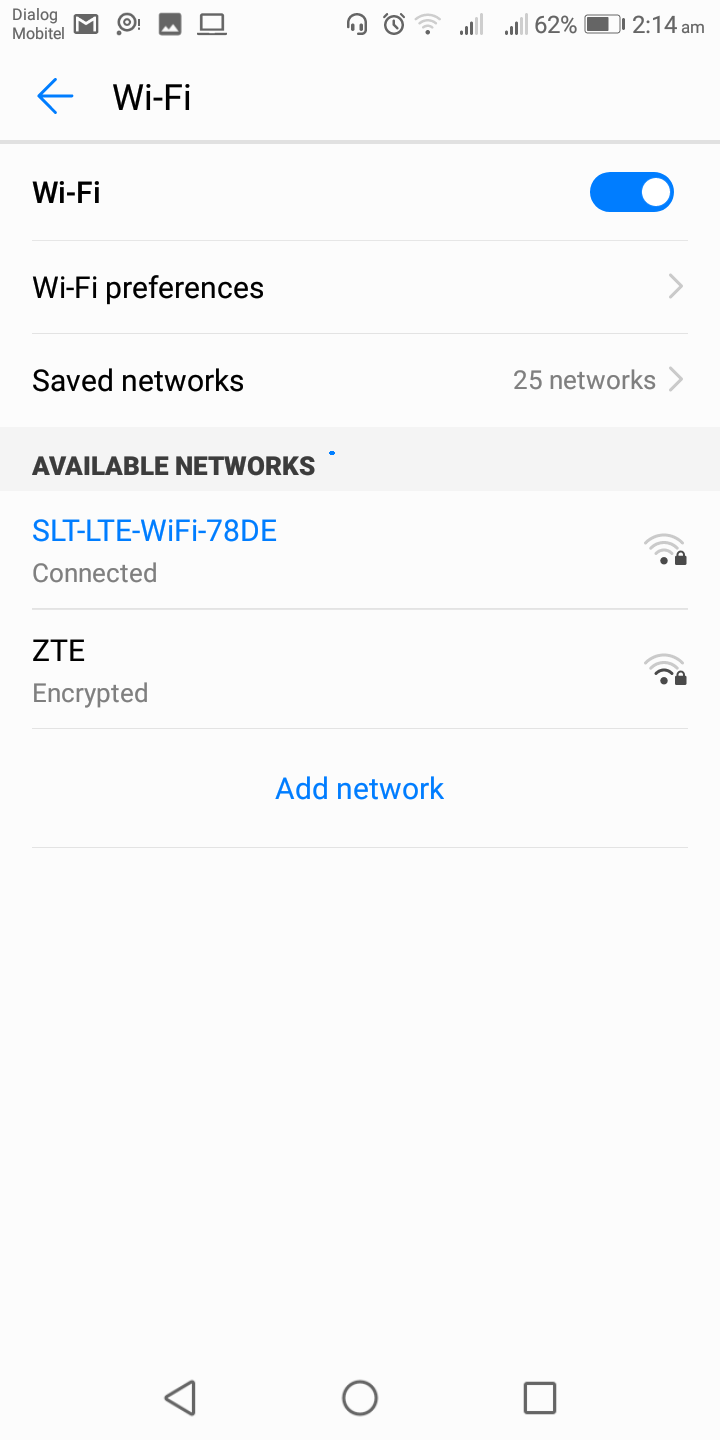
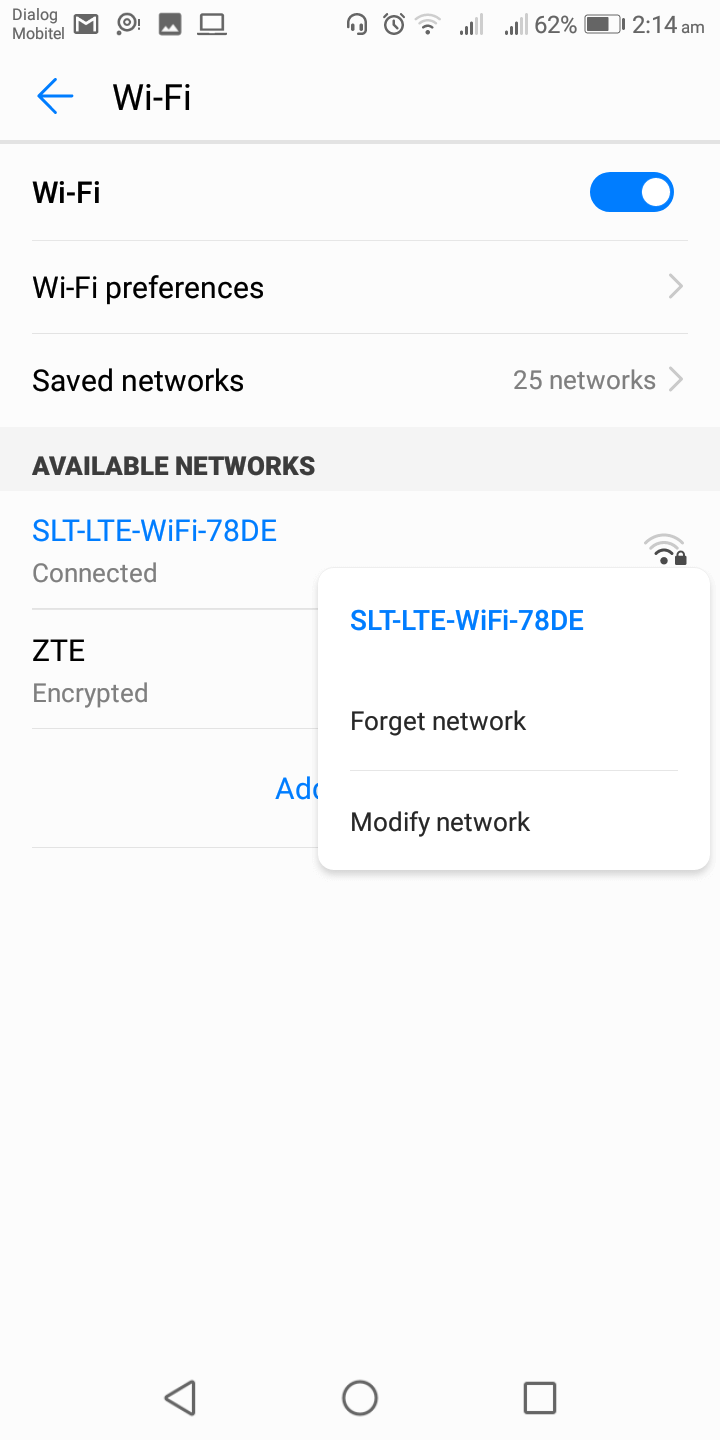
- Press and hold the Wi-Fi network your device is already connected to.
- There, tap on Modify network.
- Tap on Advanced options.
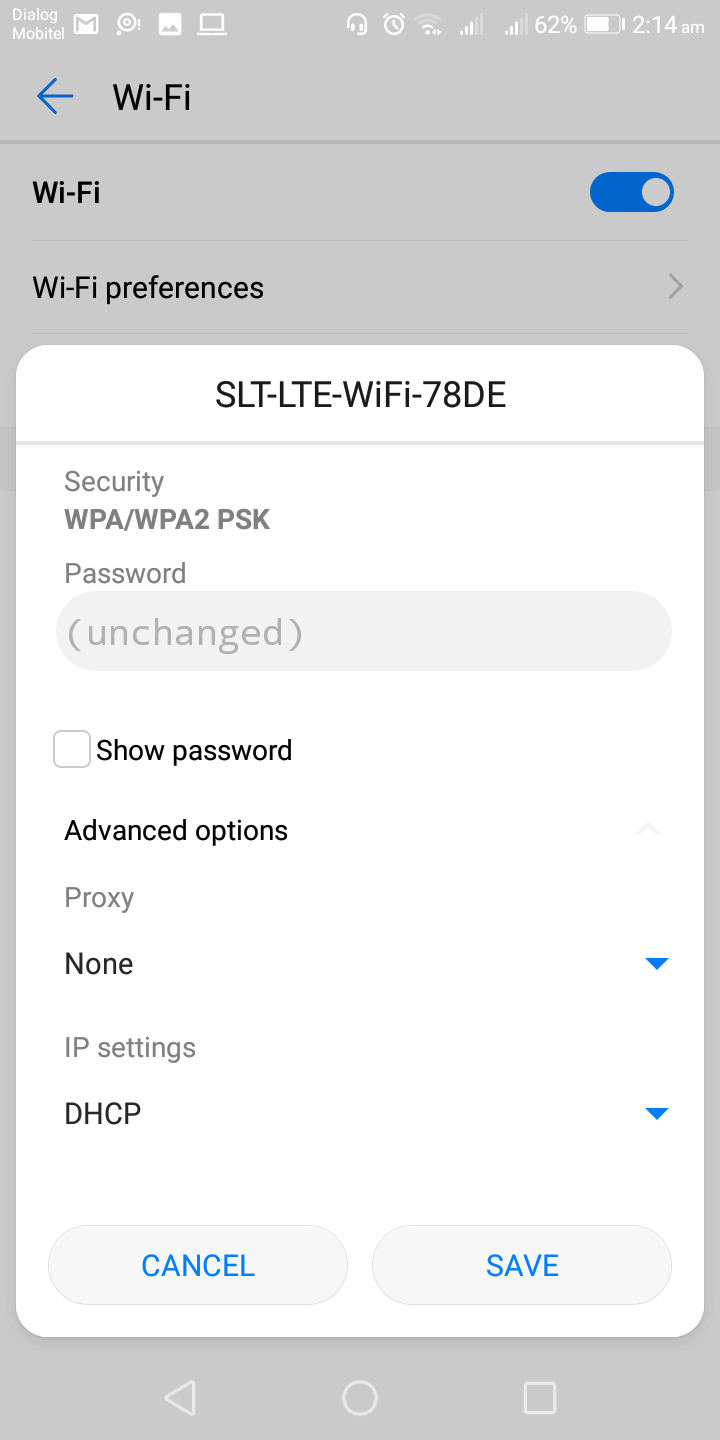
- Find the IP Settings section. You may have to scroll down.
- By default, your IP Settings must be set to DHCP. Tap on it and change it to “Static.”
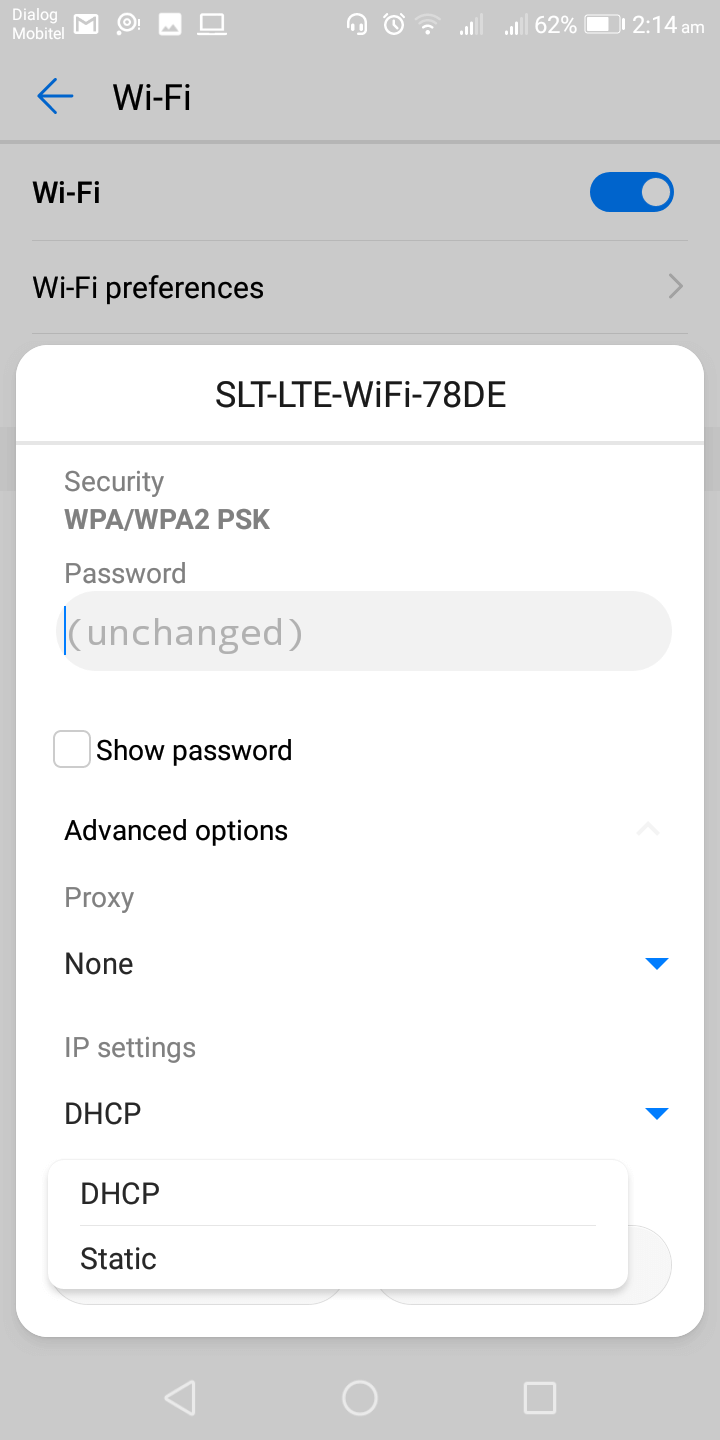
- Fill out the form and configure the network settings manually.
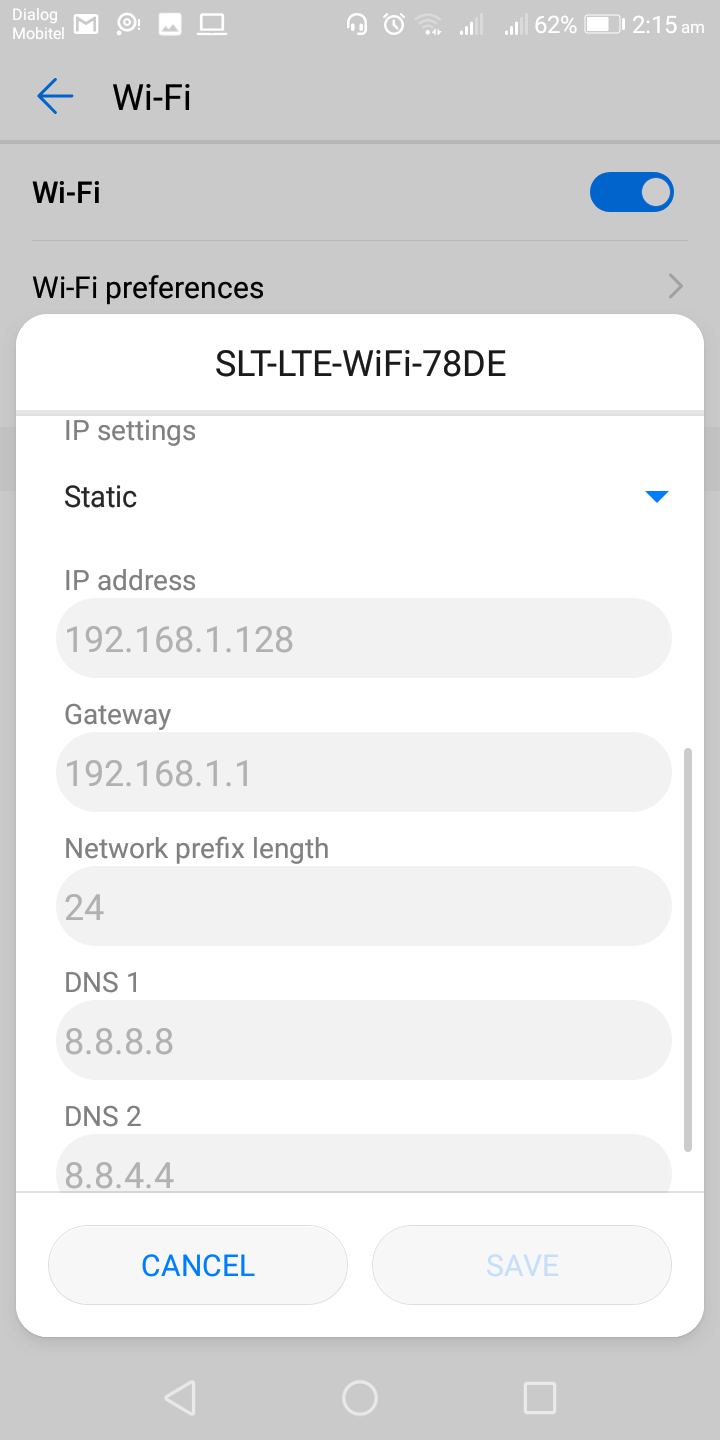
Remember the three critical addresses we discussed? You’ll have to fill out all those details when manually configuring. Here’s where you can use them.
- For the IP address field, enter the free IP address you found earlier in Step 1.
- Then enter the default gateway address (the router’s IP address).
- Enter the DNS Server addresses you found in Step 1.
- Leave the other fields as default and then save.
That’s it. All done!
Once completed all these steps, your device will reconnect to the home network with the new IP address.
Conclusion
As I mentioned, people want to change their IP address for numerous reasons. If you’ve read this far into the article, I bet one or more of the following reasons apply to you:
- To share mobile files with FTP server software
- To use your mobile phone as a Wi-Fi camera
- To access specific online content (e.g., Netflix, government-restricted sites) when you’re in a geo-blocked location.
- To run a mobile web server
- To run a mobile media server on your mobile phone
- To boost your speed because you’re on a network that’s providing controlled bandwidths for different IPs
- To avoid being the victim of cyberattacks
- To exercise freedom of speech in a place where it might otherwise be restricted
Fortunately, nothing should hold you back from doing any of that because now you know how to change your IP address and get a static IP instead of a dynamic IP. And as you’ve seen, this is easy to set up.
Please put your comments and suggestions in the comment section, and ask away if you have any questions!
7 Comments
JKT JKT
March 15, 2026 7:58 pm
Great guide! I found the steps easy to follow, and it’s reassuring to know how to change my IP address for better privacy. Thanks for the tips!
ytshorts
February 18, 2026 6:38 pm
Great tips on changing the IP address on Android! I had no idea it could be so simple with a VPN. I appreciate the step-by-step instructions. Looking forward to trying it out for better privacy!
Anonymous
December 27, 2025 3:03 am
Great tips in this post! I found the VPN option particularly useful for maintaining my privacy while using public Wi-Fi. It’s nice to have a step-by-step guide to help me switch my IP address easily on my Android device. Thanks for sharing!
orca slicer
December 17, 2025 3:12 am
Great article! Changing my IP address on Android was easier than I thought. The step-by-step instructions were clear and helpful. I appreciate the emphasis on privacy too. Keep up the good work!
Emmanuel
October 28, 2022 3:02 pm
It seems that for everbody using an android phone is connected to a wifi spot. Nowhere is showed how to change IP address when you’re using mobile data.
omega
October 26, 2022 3:13 pm
it was a good tutorial, especially the android part.
night_shadow
October 5, 2020 9:49 am
Surfshark works nicely on my Android phone, haven’t had any issues with connectivity. They also have pretty dope features in addition to the VPN service itself.